


")


By Aaron Ramson
The first (and second) beer I ever brewed was on the Mr. Beer system. You ever started a series on Netflix only to get three episodes in then decide you’re good, you don’t need to watch this shit anymore? That’s what those first couple brewing experiences were like. Mr. Beer was the Iron Fist of home brewing and it didn’t hold my interest.
It’d be about four years before I brewed another beer again; and this time the experience was very different.
Christmas 2011 saw me gifted (just like with the Mr. Beer) one of those deluxe homebrewing starter packages like I wrote about in the last installment of Brewtality. This one came with a steel brew pot, a bucket for fermenting, a glass carboy for aging, all the accoutrements to start up your home brewing system, and an extract kit of American Hefeweizen. Extract kits are the perfect thing for beginners to start on. Instead of working with a big sack of barley grains, you’re working with a can or jug of concentrated wort called a malt extract.

So, gravity is the term used to measure the sugar density of your beer. You take a reading pre-fermentation, when your wort (pronounced “wert”, and it’s the German word for the sugary liquid you’ve created with your malt and hops) is sweet and unfermented by the yeast. That number is referred to as your “original” or starting gravity. It’s what’s referred to when you see the term “OG” when it comes to craft beer. No, it’s not proclaiming that the beer has been around the neighborhood for awhile and is respected as an original gangster. I mean, unless it really has. In which case the OG of your OG better reflect that shit.
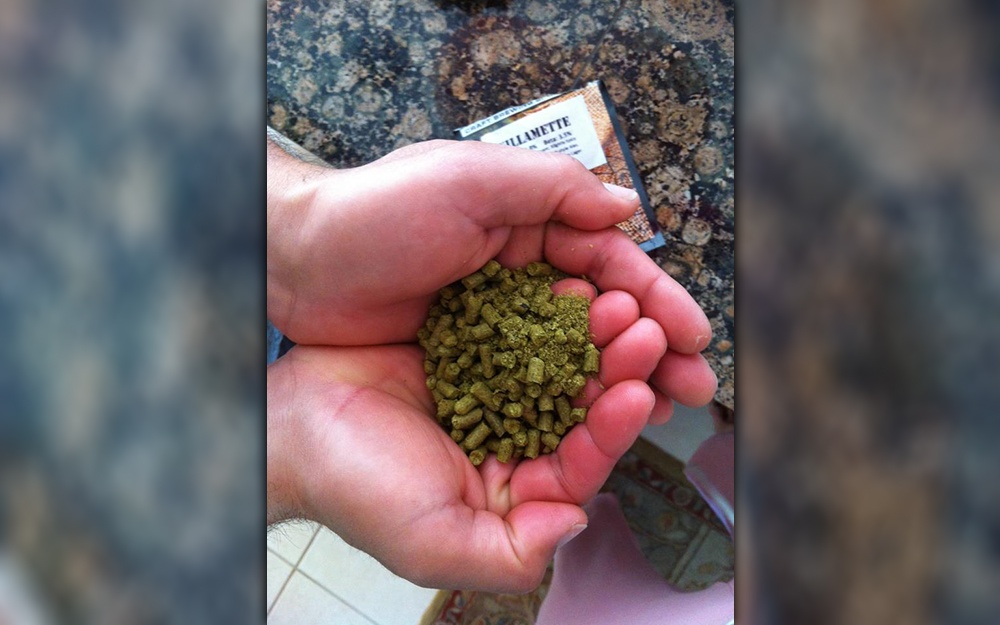
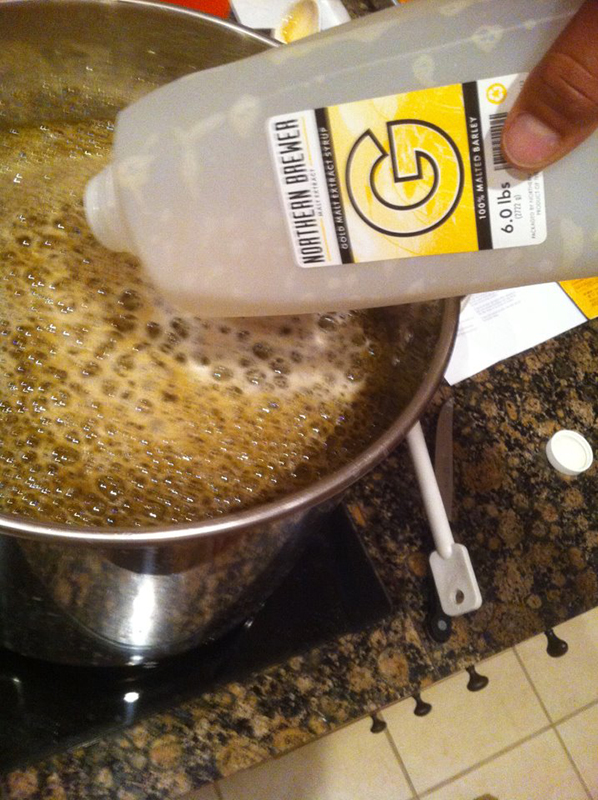 Anyway, back to malt extracts and water. Sometimes you get a bag of dried malt extract with your kit instead of liquid extract. Either way, the principal is the same, you simply add it to water and boil for a specific amount of time. That amount of time is determined by the style of beer your making, and how many IBU’s that style requires. Almost all-American craft beer features hops and the amazing flavors they contribute. From Blonde Ale’s and Amber lagers, to IPA’s and Imperial Stouts, there is a level of bitterness required, as well as an appropriate level of hop character and flavor. All of those characterizes are determined by how long hops are boiled. The standard is to boil some hops for an hour, and this adds the bitterness. The longer you boil hops, more bitter they become. It’s common to see the recipe call for more hops at around 15 minutes before you turn the stove or burner off, and this addition is what gives you a combination of hop flavor and a little more bitterness. If the recipe calls for any more hops in the last 10 minutes of boiling, those puppies add even more hop flavor to your brew.
My Hefeweizen kit came with Cascade and Willamette hops, and directions to add hops at 60 minutes, and 15 minutes before flameout. I even added lemon and ginger root to my beer, going super-craft right from the jump. After my beer was done boiling, it was time to cool it down. Most beginners won’t have invested in a wort chilling device and pump, so the easiest way to get your beer down to temperature is with an ice water bath. Chilling your beer quickly ensures that you don’t lose the hop flavor you added with your later additions and gives bacteria less of a chance to infect your wort, which needs to be kept completely sanitary at this point. You’re going to now be adding yeast to what you brewed, and yeast are not tough little boogers at all. The don’t like wort that’s too hot or too cold, they don’t like other organisms skulking around the wort with them, hell, they don’t even like if you add too much or too little of them to the wort. They’re total prima donna’s and I kinda wanna punch yeast in the face. They are however, hard workers if treated right, and that right treatment begins with cooling down your wort to about 70 degrees before adding them. The yeast will either be liquid or dried; just like malt extracts.
You are most likely going to be brewing an ale, and your ale will want to ferment at cool temps, preferably about 64-78 degrees, so unless you have a dedicated fridge to put your wort in, you’ll want to wait till summer is over to brew, so the ambient temps in your home will be perfect for your new beer. Measure the gravity of your beer every several days until you notice the gravity stops dropping. This means that the yeast is done fermenting things, and your beer will now need to sit and age for a short period of time while the flavors mellow out. Congratulations, you’ve brewed your first beer!
That is the gist of extract brewing. It’s a fun and relatively easy way to brew your own beer at home, and unless you really suck at it, you’re almost guaranteed great results. Next week I’ll go over another popular type of homebrew kit that combines malt extract with grains, called the partial-mash kit.


