By Aaron Ramson
My friend Devin says her husband started home brewing, and now the house always smells like cereal. At the brewery one day, a beer tender came in to work as I was boiling wort, and announced that the entire building smelled like goldfish crackers. Beer making creates a delicious smell, and I don’t think any beer smells better when you’re cooking it than a New England style IPA, especially when you add those late hops. There really is no wrong way to create this style of beer, despite what people may tell you, and if there’s any beer you’d want to brew as your first all-grain batch, this would be the one.
Beer haze is created by protein particles suspended in solution, and some grains have more of these proteins than others. It’s these varieties that you’ll want to include in your recipe. Wheat, oats, event spelt; a combination of these types of grains should be used in tandem with your base malt, which will be barley. The type of base I recommend is Simpsons Golden Promise, if you can’t come across that variety, Maris Otter works almost as well, and good old American Pale Ale will get you by in a pinch. Despite what the internet or your pretentious friends may tell you, there’s no wrong way to brew your own fricken beer.
As with most things in life, you’re going to use a bit of math when crafting your own beer recipes, so thank god that the smart phone you’re reading this on has a calculator built into it. I recommend you keep your recipe at about 80-85% of your favorite base malt, and use white or flaked wheat, spelt (a grain closely related to wheat) and/or oats to fill out the remaining 15-20% of your malt bill. I kept my first Hazy IPA simple and went 83% Maris Otter, 9% white wheat, and 8% flaked oats.
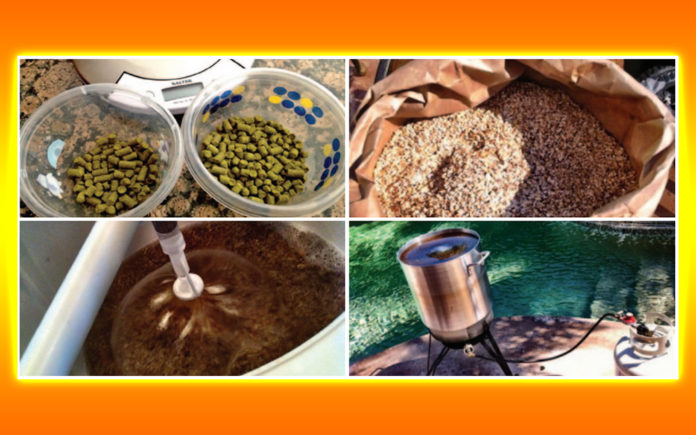
Now if you’ve never brewed an all-grain batch of beer before, then you don’t know what a lifesaver rice hulls are. Cracked barley will result in the seed being broken into several chunks, while the hull itself largely remains in one piece, and those hulls create a filter of sorts during the lautering phase of your mash. Lautering is the phase where you separate the liquid from the grain and recirculate it to extract as much sugar as you can during the sparge process. Since neither oats, spelt, or malted wheat have hulls, they don’t contribute to the filter that barley hulls create, and that’s where rice hulls come in handy, as adding them to your mash is the surrogate that’ll keep your mash from clogging and sticking during your lauter. Don’t include it as part of your grain bill ratio, just add a few handfuls to your mash as you steep it. And pro tip, don’t mill your oats. If you’re used them flaked, just throw them whole in your mash tun. You can use rolled oats if you like, but just remember to cook them first to gelatinize the starches before adding them to your mash.
Some people prefer the ease of the brew-in-a-bag method, and if that’s the way you like to brew, then you don’t have to worry about a sparge. I personally see that method as throwing out the baby with the bath water, as there’s so much residual sugar left in those grains after you drain your wort out of them. I’ve always enjoyed the full process of all-grain brewing, and that includes the sparging stage. There’s no real trick to it; I remember reading all this debate about fly vs batch sparging, and the bottom line is that you’ve got to keep very warm water sprinkled over the top of your wort so that the grain is never truly exposed. Keep your sparge water around 165 degrees and stop when you’ve collected your full batch of wort, usually about a gallon over what you want your final volume to be. Boiling will evaporate and condense your liquid, and the hops you will be adding will turn a portion of your wort to green sludge that you’ll want to leave behind and not add to your fermenter.
Just about every beer style in the world calls for bittering hops as a way to balance and flavor to a brew, but since there is nothing balanced about a NE style IPA, bittering hops are omitted altogether in most recipes. The point of this beer is to create a hop salad that is all dank and no bite, and the hopping schedule reflects it. Instead of the classic “C” hops associated with the West Coast style of IPA, try to get your hands on hops with a more tropical and musky type of flavor. Galaxy, Nelson, Azacca, El Dorado, Citra, Simcoe; you’ve got quite a lost to choose from. I chose to add my first hop addition at 15 minutes before flameout, but a lot of brewers will tell you that a giant hop addition at whirlpool is all you really want. The whole point is to extract those hop oils from your flowers or pellets without isomerizing and bittering them through prolonged boiling. Once you’ve got your hopped wort cooled and transferred to your fermentation vessel, it’s time to choose what yeast you send into battle, and this is a very important step.
You’ll want a yeast that gives you citrusy, fruity esters to compliment the juicy hop character you’re going for. Wyeast’s London III is the go-to choice for many brewers and is what I used by recommendation. Imperial Organic also makes a strain called Barbarian which is said to be the holy grail of NE IPA yeast strains. “Cali” style yeasts aren’t recommended, as they are a bit too neutral, and tend to dry your beer out.
Dry hopping is a huge component in NE IPA, and I recommend you go for a two-stage hopping schedule. A lot of brewers even recommend hopping during the primary phase of fermentation, as this is said to help create more of a haze. In any case, you’ll want to dry-hop twice; the first time at least a week before bottling/kegging, and again two days before. This gives you a combination of the grassier flavors associated with prolonged dry hopping, as well as the soft and juicy flavors that come from minimal contact. If you’re serious about having a billowy, turbid appearance to your brew, store your bottles or keg upside down before serving, as to really put the yeast in suspension when you pour your first glass.


